Table of Contents
Troubleshooting
Doors
The doors are not the mystery they once were, with owners becoming more self aware as specialist knowledge diminishes.
Building a reference guide will take some time to validate as symptoms do not always relate to the expected fix, but below is a compilation of possible fixes.
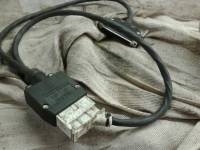
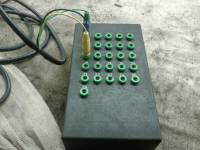
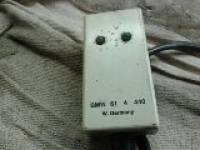
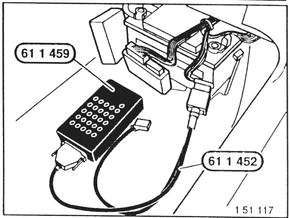
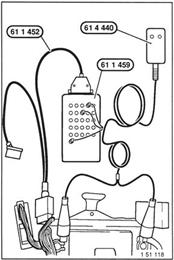
Some of the more keen enthusiasts will remember BMW produced a “Breakout Box”, consisting of 3 parts, an LED Indicator, the Controller and serial cable for testing continuity of the doors components.
611459, 611452 611450, Cartool GMBH, Alfred Brehnm strasse D-85053 Ingolstadt.
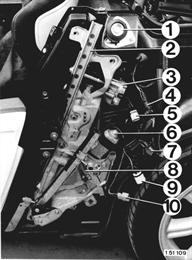
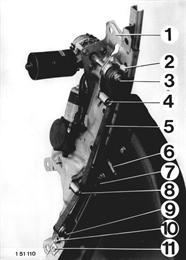
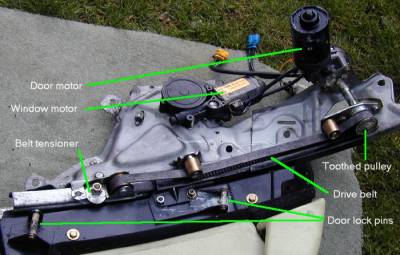
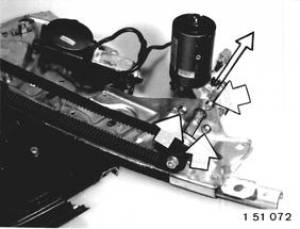
Door Baseplate Assembly
- Door push button
- Roller guide
- Door lifting motor
- Black microswitch plug on door push button/lock cylinder
- Yellow door lifting motor plug (power supply)
- Window lifting motor
- Black two-way microswitch plug on lock
- Window lifter guide rail
- Wite window lifter plug (control)
- Blue window lifting motor plug (power supply)
Removing the Door
Click for detailed instructions.Door Removal
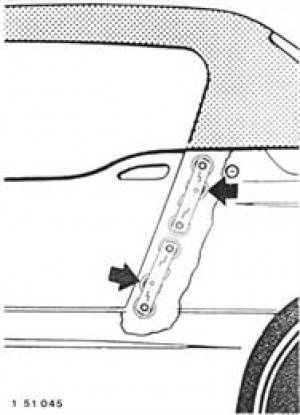
Door Alignment
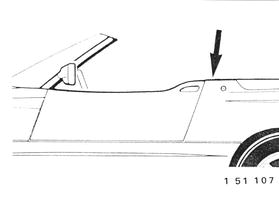
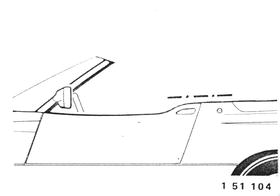
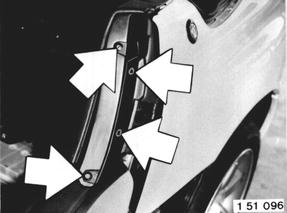
Install outer door panel and front side panel when necessary. Mount rear side panel and hold it with one screw on the B-pillar at the top.
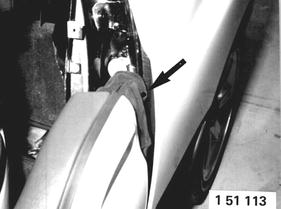
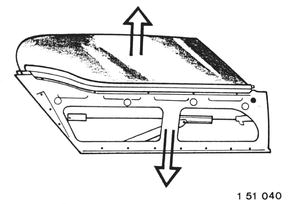
Raise the door by hand. Lift door at the rear until the upper edges of the outer door panel and side panel are in the same plane.
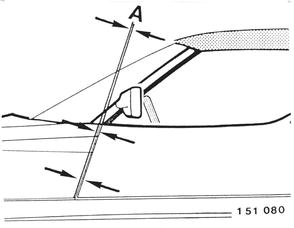
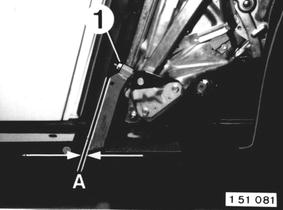
Lift door at the front until gap A is uniform. Tighten screws and nuts on the baseplate.
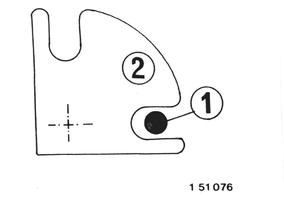
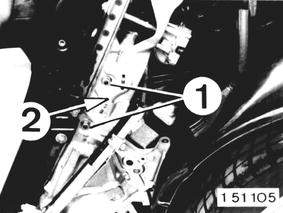
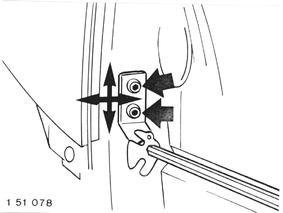
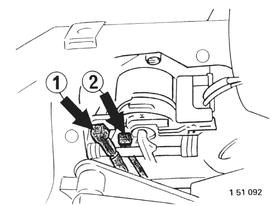
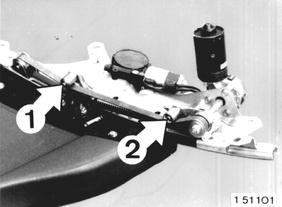
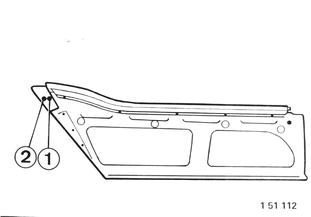
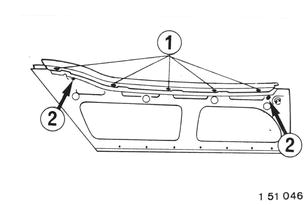
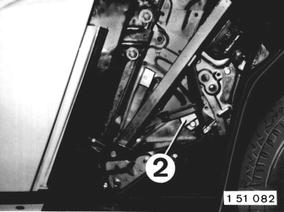
Make a trial run by hand. Check engagement of lockpins (1) in strikers (2) - lockpins should engage in the middle of strikers. Adjust the lock shaft when necessary.
Note: Adjustment of the lock shaft might be necessary if the lock shaft was removed. If not removed, do not change the factory adjustment.
Lock Shaft Adjusting Procedures:
- 1) B Pillar Lock Shaft Holder
- Raise the door.
- Loosen lock shaft holder screws.
- Loosen screws (1).
- Adjust the lock shaft.
- Tighten lock shaft holder screws.
- Remove tension between the lock and lock shaft with light knocks from handle of a hammer on point (2).
- Tighten screws (1).
- 2) A Pillar Lock Shaft Holder
- Raise the door.
- Loosen lock shaft holder screws from below with a long 6 mm wrench key.
- Adjust the lock shaft.
- Tighten lock shaft holder screws
Note: If an uniform door gap can not be reached by tilting the door with the baseplate, make corrections on the door/baseplate connection (guide rollers). Corrections on the door/baseplate connection are permitted only when it had been disconnected for repairs. The door guide on the A pillar is designed with 3 mm (0.118”) thick spacers. The window is used to determine a new thickness, e.g. after an accident. The window glass should run up into the middle of the rubber seal precisely when raised.
Door Button Removal
- Remove rear side panel
- Remove rear pillar plate
Caution! Pull out fuses 25 and 26 in the interest of safety.
Disconnect plug (5) and guide it together with the rubber grommet through the bore.
Disconnect linkage.
Note: A removed convertible top will make adjustments on the linkage easier.
Unscrew screws.Turn the door push button about 90° while removing.
Installation: The sheet metal tabs on the door push button opening must be bent over to prevent losing the ring, with which the door push button is screwed.
- Insert door push button.
Guide wire with rubber grommet through hole. Check for correct fit of rubber grommet in the hole.
- Connect plug (5).
- Install rear side panel.
- Screw on door push button.
- Connect linkage.
- Install rear pillar panel.
Adjusting Button Linkage
Note: A removed convertible top will make adjustments on the linkage easier.
Requirements:
- Door control microswitch and lock are okay
- Open top.
- Shut doors and lower door windows.
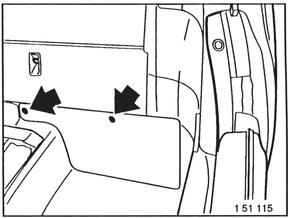
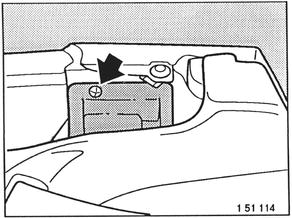
- Slide left seat forward and open battery flap.
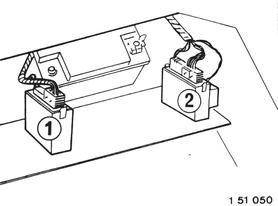
1 = Control unit for right door 2 = Control unit for left door
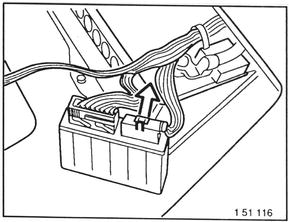
Adjusting Linkage for Left Door Push Button: Unlock plug on control unit (2).
Adjusting Linkage for Right Door Push Button: Unlock plug on control unit (1).
Pull 26-pin (white) plug off of control unit and connect on test box 61 1 459 using adapter lead 61 1 452.
Caution! Don´t connect the control unit.
Connect microswitch tester 61 4 440 to car´s battery using red and black clips.
Note: Check function of microswitch tester by holding yellow and blue plugs together ⇒ yellow LED must light up. Then hold green and blue plugs togehter ⇒ green LED must light up.
Connect plugs (blue, green and yellow) on test box.
- Blue = Pin 26
- Yellow = Pin 8
- Green = Pin 4
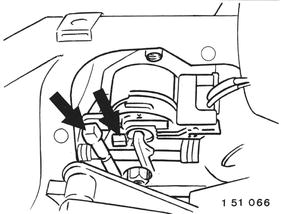
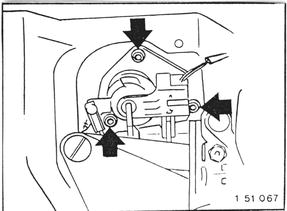
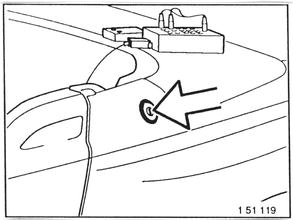
Unscrew panel.
- Linkage 1 : Central lock emergency operation
- Linkage 2 : Lock operation
Adjust linkage (2) until following switch functions are guaranteed.
Press door oush button as far as stop. Both LEDs must light up.
Release door push button slowly. Green LED must go out after travel of 1 to 2 mm. Yellow LED must still be on.
Disconnect microswitch tester, test box and adapter leads. Reconnect control unit plugs.
Door Scratches
Scratches on the face of the door is a common fault, they appear if there is a build up of dirt on the inside of the lower trim panel, or if the panel is bent. This can be a permanent bend or temporary, caused by someone leaning on it as the door is operated. Vertical scratches are due to abrasion when raising and lowering the door, horizontal scratches are caused by vibration of the door during door open driving.
Remove the side sill and clean the inside thoroughly, also check the sill is not bent inwards. If it is, remove a slither of the inside plastic where contact is made, with a file or sandpaper, increasing the gap between door and side sill.
Door wont open
It is unlikely the door wont move in most cases, depending on whether opening from the inside or outside. When depressed, the outside door button activates a microswitch so listen carefully for that. At the very least the push button should release the locking mechanism and the door will drop slightly, enabling access, as would the inside door handle.
Possible Causes
- 1. Fuse 25/26
- 2. Door Belt
- 3. Microswitch
- 4. Door catch
- 5. Pushbutton
- 6. Door Motor
- 7. Door Control unit
If a Microswitch is suspected, there may be a bad connection between the white connector and the door control unit (oxidised contact pins). You can check the switch with a meter.
- 1. Remove Fuse no 26. - 2. Disconnect the white connector from the door control unit on the RHS of the battery, remove the cover and check for possible corrosion. - 3. With the door unlatched, (it can be moved by hand) there is no contact between the red/white - red/black red/white - red/blue and no contact between red/black and red/blue. - 4. After unlocking the catch of the door by pressing the door lock inside the red/white cable must have contact to the red/black cable. - 5. When you depress the door button fully, there must be an addition contact between the red/white and red/blue cable.
Door wont close
If the door is STUCK in the down position, one of the main causes is the Door Control Unit, try swapping the 2 units located in the battery compartment, LHS is for the drivers door and RHS for the passenger.
If that does not work, there might be a mechanical lock problem. Try taking the fuses out, and with the help of an accomplice, hold the interior door handle open whilst raising the door. That should release the lockpins from the shaft. It needs a BIG pull so watch your back.
To make it latch in the up position, you'll need to get some momentum going on the door travel otherwise it'll just ease down again. Put fuses back in and see if the problem is still there.
NOTE: If the motor runs, the belts moves when you depress the door button, but the door stays down, the belt has had it. It is a partially toothed belt, and the door is clamped onto it. Either the belt is moving through the door clamp (see www.bmwz1.co.uk) or the motor drive is slipping on the belt - in which case the belt wont be moving.
Double check the above, if one of these functions are missing the microswitch is most likely faulty and a new door catch is required. it has been known for the door switch to lock, resulting in the drive shaft that comes from the motor to the belt to shear off.
Option 2: When driving if the door starts to slide down of its own accord. There is no power with the electric window, it does seem to lock in the closed position. The faulty part might be the sensor in the button mechanism or the door control unit.
Door Belt
The most common causes of premature belt failure are: (not in any order)
- Malfunction of the window lift mechanism, causing greater strain on the door belt.
- Incorrect tightening of the belt post installation and door hanging.
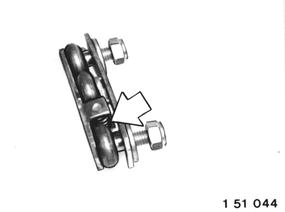
- Misalignment of the belt guides. These are convex rollers which the belt runs on.
If they are not correctly aligned, the belt will run off to the side of them and rub on their tin bracket. Correct alignment is by bending them on their brackets until the belt stays central. This should be done after the fitting of a new belt by running the door mechanism whilst still off the car.
It is important that the replacement belt is centred in the convex bronze pulleys, without rubbing on the pulley sides.
Check the following page: Doors, there are some pictures and instructions for belt replacement. Once the new belt is fitted, it should be conneceted to 12 volts and run up and down a couple of times to make sure it isn't rubbing on anything.
Toothed Belt Assembly
- Baseplate
- Tensioning roller
- Drive roller
- Tensioning roller, upper
- Toothed drive belt
- Lockpin
- Clamp
- Tensioning roller, lower
- Reversing roller
- Eccentric
- Attaching eye
Belt Removal
Remove door complete with baseplate
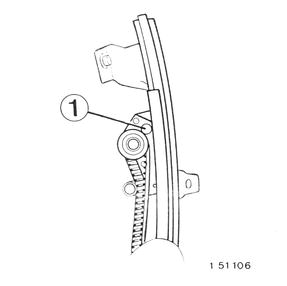
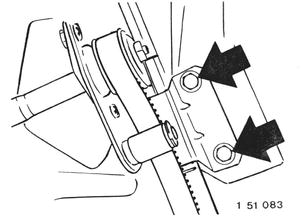
Note: Place door on a soft surface to avoid scratching the painted parts. OR: Remove the painted outer door panel and remove tensioning roller (1) on the drive roller.
Unscrew locknut (1) and loosen the toothed drive belt.
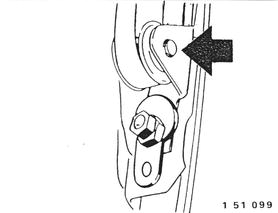
Remove retainer on shaft. Pull out shaft. Take roller out of the holder.
Unscrew nuts. Take off clamp. Remove the toothed drive belt.
Installation: Tightening torque = 6 Nm (4.3 ft. lbs.).
Installation: Install the toothed drive belt.
- Insert lower roller in the holder.
- Install the shaft.
- Install retainer.
- Install tensioning roller on the drive roller at the top.
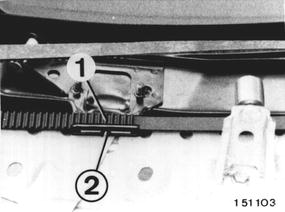
Mount clamp in such a manner that the 1st tooth of the toothed drive belt (1) is aligned with the edge of older (2). Tighten clamp. Tightening torque = 6 Nm (4.3 ft. lbs.).
Adjustment: Tighten the toothed drive belt lightly with the eccentric bolt. Final tightening is performed after installation of the door. Adjust door in such a manner that the baseplate can be run without danger of knocking.
Caution! Danger of clamping. Supply 12 volts current to the door motor on the 2-pin plug (yellow). While running the door baseplate the toothed drive belt must not run on the sides of the upper and lower rollers.
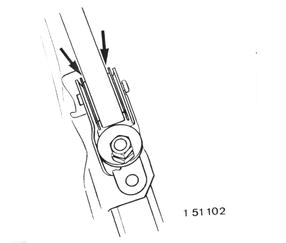
If necessary, straighten holders of tensioning rollers (1 and 2) with, for example, a pliers.
Maladjustment of the tensioning rollers will lead to premature toothed drive belt wear.
Belt Tightening
Caution! Pull out fuses 25 and 26 in the interest of safety (danger if being clamped in the door) and to be able to lower the door by hand.
Press door push button and lower the door about 30 mm (1.181”). Remove middle side panel.
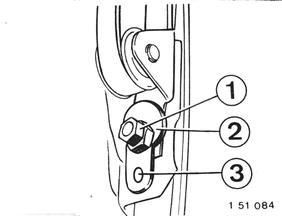
- Locknut
- Eccentric
- Tightening eye
Unscrew locknut (1).
{{:tb9.jpg?|}
Attach a standard spring-loaded scale in the tightening eye. Tighten and hold toothed drive belt in the running direction. Force = 20 kg (44 lbs.).
Adjust eccentric (2). Tighten locknut (1).
{{:tb10.jpg?|}
Twist the toothed drive belt above the reversing roller with a thumb and index finger. The toothed drive belt is tighten correctly when it can still be twisted by about 45°.
{{:tb11.jpg?|}
Manual Operation
If the belt is broken, grab hold of the door and perform the following:
- 1. Put the window down, its easier to operate the door with it open
- 2. Grab hold of the door from the outside
- 3. Release the lock mechanism by depressing the Pushbutton from outside or pulling the handle from inside, holding the door will prevent it from crashing down.
- 4. To close the door, release the locking mechanism, and pull the door up with both hands via the recessed grip on the outside and one under the elbow rail on the inside). After the door locks mechanical you can close the window by using the window switch.
—-
Opening door with flat battery
Insert key and rotate forwards to the unlocking position.Then push key further IN and rotate again further forwards. The door will now unlatch mechanically and can be easily pushed down.
Raising the door is the same, however the handbook says:“Considerable force may be necessary” This cannot be underestimated as you have to lift the weight of the door, and drive the lifting gear.
Do find a way of keeping the battery topped up when the car is stored, such as trickle charging or Cut Out Switch.
Door rises too high
Another common fault is the door going past the 'end' point, or rising too high, not latching and placing stress on the rear quarter panel, cracks begin to appear around the torq fixing point.
Door Button not working
Most commonly caused by the Door Catch position. This can be adjusted by gaining access to the door catch, loosening the main plate and adjusting the position either up or down, retighten and test again. Look at how the barrel itself works, remove the plastic cover behind the barrel, held on by a single screw and adjusting the lower ball jointed bar, 1 or 2 full turns.
If it's a latch problem, there may be a problem in the rod-length / microswitch area, the rods are all adjustable for length. It is possible to take the rear wing off and push directly on the rods to see if they will work, if so adjust for length. If not, then test the microswitches.
Door Catch
The door switch catch is the main component in the functionality of the door. Proceed with caution and treat with respect. Priced at £590, this item is No Longer Available (NLA) The switch is located on a brass coloured plate, to access remove the side sill and rear quarter and the door. The switch is part of the whole plate and comes as a complete unit from BMW. It costs about £200 in 2003. You can check its operarion with a multimeter if you open one of the multiplugs infront of the rear wheel arch.
Microswitch
Activated when the door button or inside handle is activated, you cannot replace the microswitch on its own or access the bits you need to cure a microswitch problem without removing the door, as they are located within the door catch mechanism.
The microswitch is a sealed weatherproofed unit and cannot be repaired, but can be tested using a multimeter or BMW Test Unit described above.
Central Locking
Central Locking is activated and deactivated by inserting the key into the Door Button Barrel and twisting to the Left/Right to Lock/Unlock. Fuse No27 has been known to fail, so check this first for issues with your Central Locking unit, which is located behind the drivers seat, No27 in the fusebox
Door Control Unit
It is common for the contacts in the control unit to become dry and cause the unit to fail, can be more severe in winter, one option is to take the cover off the unit and give it a good spray with contact cleaner, remove the circuit board and clean all the contacts.
The control units are manufactured by Brose and the last remaining units were sold to Franz Schaffer, the only known source available at £1600 per unit.
Door not latching
Normal Operation: Normally, on closing the door, the door comes up followed by the window once the door is in position. The symptoms: The door and window rise as soon as button is pressed. The door/window then travel to their fullest extent, stops for about 5-6 seconds, then drops back down.
The window motor in the door is not operating correctly, the grease in the motor gearbox gumms it up.
On releasing the door, the window motor and the door motor should both lower their respective items. If the window is not fully lowered, when the door goes back up, the window is being forced shut, not by the window motor, but by the door mechansim (via the 'return to orignal position' linkage).
This puts a lot of strain on the door motor - could lead to belt failure.
As the window is effectively being rammed right up before the door gets to the top latching position, the door is prevented from latching, and drops a bit.
Try disassembling the mechanism, take the door off(!), clean and re-grease the window motor gearbox.
Option 2 A quick fix may be to apply firm pressure to the door when it slides down after the 5/6 seconds, ensuring the door reaches the lowest point of its travel.
Door Button
The door does not shut using the door button
A problem with the pull/ push rods in the linkage.
When the exterior push button is pressed, it operates a series of rods to activate the actual switch which is situated behind the rear wing panel. You can test this by taking the rear wing off(!) and directly operating the plunger behind the door lock. If the door works by this operation, then only rod adjustment is needed.
Grinding Noise
Door making a mechanical grinding noise when moving.
The door runs in two parallel slots, hence the shims to ensure the fine manufacturing tolerances.
Check the correct number of shims are installed in the right places, this could place undue loading on the door motor. The correct number of shims is painted next to each mounting point for the door plate, on the chassis, see www.bmwz1.co.uk for more info.
Without these markings, it is impossible to know what the shim thickness as these cars are hand built, each car is different.
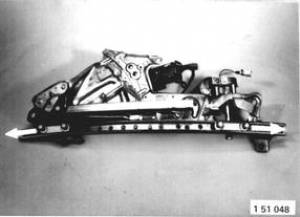
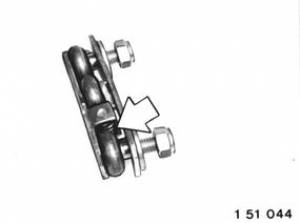
Replacing Guide Rollers
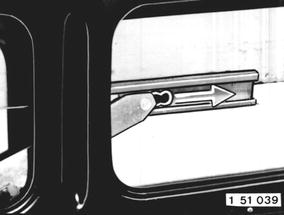
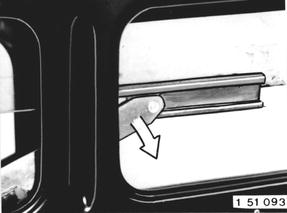
Remove door complete with baseplate, Take door off of baseplate. Push guide rollers out of the rail.
Important! Make sure that the spring is not lost!
Installation: Check installed position of guide rollers!
Inside Handle
The inside door handle when pressed, door does not move, despite hearing a click indicating the latch is working, nor does the interior light come on, however the outside button works fine.
Possibly caused by the internal door handle connecting rods have become maladjusted, (probably short).
Open the round Inspection panel under the carpet. Inside is a rod adjuster and the actuator for the central locking. The adjuster has a lock nut - using a permanent marker scribe across both the adjuster and lock nut so that you know how they are aligned now.
Then try adjusting a turn at a time to see if you can make it all work. THIS IS GUESS WORK - YOU WILL NEED TO KEEP COUNT OF THE NUMBER OF TURNS AND DIRECTION - ELSE YOU WILL NOT BE ABLE TO GET BACK TO THE CURRENT KNOWN POSITION.
When it seems OK, dont forget to try all the combinations of door and window raising and lowering to ensure that it is working, mark the new positions.
Door Window
Removal
Caution! Pull out fuses 25 and 26 between the various steps in the interest of safety (danger of being clamped in door or window) - see 51 00 for general information.
Installation: Check for correct seating of window in seal after installation with the convertible top closed and the door raised, adjusting the window if necessary.
- Raise the door.
- Loosen screw (1).
- Unscrew screws (2).
- Lower the door.
- Take off door trim panel (upper).
Unscrew screws and pull out expansion rivets. Take off plate.
Pull out expansion rivet.
- Raise the door lower the window.
- Unscrew screw (1) and pull out expansion rivet (2).
- Lower the door and take off the edge guard.
- Raise the door.
- Unclip and lift out door trim panel from above.
- Unscrew screws (1) and take off window plate.
- Unscrew screws (2) and take off window stops.
Installation:
- Lower the door window.
- Insert window stops and screw on nut.
- Raise the window, press window stops against the window glass without force and tighten.
- Lower the window.
- Install the window plate.
- Raise the window to an opening of about 150 mm (6”).
- Pull out fuses 25 and 26.
- Pull out retainer from the sid.
Hold the window glass tight and disconnect the window lifting arm.
Installation: Insert the retainer in the slide and then connect the window lifting arm.
- Lift window glass.
- Press the door push button and push the door down.
- Lift out the door window glass from above.
Note: Make sure that the spring is not lost. Picture was taken with the roller guide removed.
Installation: Window holders are cemented with Sikaflex X-255.
Adjustment
Remove middle side panel, lower the door and window. Adjust gap ! to be parallel on bolt (1).
Note: It must be easy to press a lowered window further down with moderate thumb pressure on the upper edge of the glass when the door is lowered.
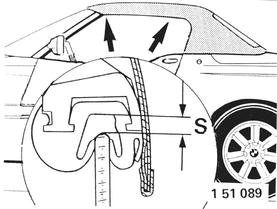
Close the convertible top. Raise the door and door window. Window glass should seat uniformly in the seal everywhere. Adjust gap “S” when necessary. Distance S: 3 to 5 mm (0.118 to 0.197”).
Window lift is adjusted with stop (2).
Turn or displace window laterally:
- Unscrew door guide rails in the door body.
- Adjust glass.
- Tighten window guide rails at top.
- Lower the door.
- Tighten window guide rails at bottom.
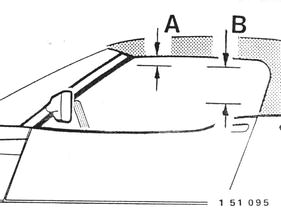
Note: A clamping prevention protector is switched on in zone B while raising the window. The clamping prevention protector is switched off again in zone A.
- Distance A = approx. 4 mm (0.157”)
- Distance B = approx. 200 mm (7.874”).
If the window stops in zone B while raising the window or lowers further, check whether the window runs easily:
- Door window seal in area of cowl panel and top
- Roller guides
- Door lifting mechanism
Replacing Window Motor
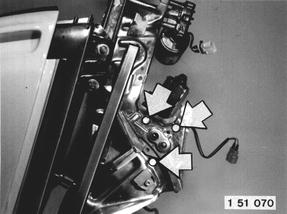
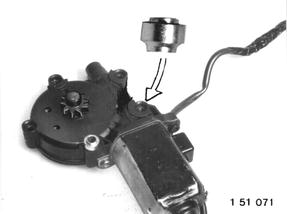
Remove door complete with baseplate, unscrew screws. Take off power window motor. Installation: Tightening torque = 5 Nm (3.6 ft. lbs.).
Installation: Insert spacers with the tapers facing down.
Door Microswitch
You cannot replace the microswitch on its own and you cannot access the bits you need to cure a microswitch problem without removing the door. The Microswitch is a sealed unit, waterproofed against the elements, use a multimeter or Breakout box to test continuity.
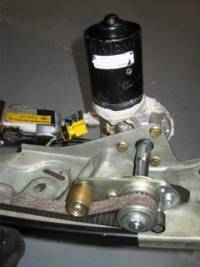
Door Motor
The door motor has lasted the test of time, a testament to the build quality of BOSCH motors, they are still available from BMW at a cost of £700. BOSCH P/N: 058 949 0390 251 691 CHP.
The drivers door is the most used and therefore most likely to cause wear and tear problems, conversely the passenger door if not used can cause the motor to get clogged up.
The motor in itself is the same on both sides of the car, however the gearing is directional and cannot be detached from the motor housing. They are extremely resilient BOSCH designed and have lasted in most cases the duration of the cars life so far.
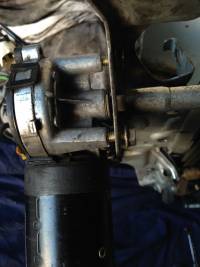
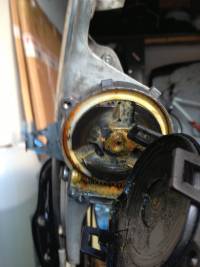
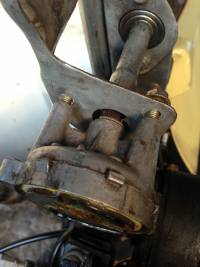
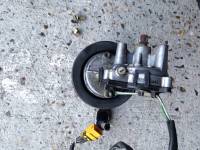
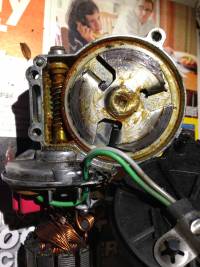
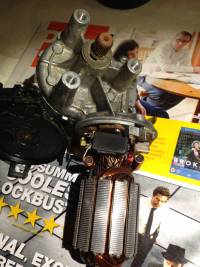
A Failed Motor
This motor was the cause of the door not latching correctly.
Replacing Door Motor
Remove door complete with baseplate, unscrew screws.
Installation: Tightening torque = 5 Nm (3.6 ft. lbs.). Take off power door motor.
Motor Transistor
It has been reported that an owner with a problematic door motor on his 1989 car used the transistors from a 7-series window motor. This applies to earlier door motors (late '89 in his case) and may or may not be applicable to the later cars. There may have been a different motor used at the beginning of 09/90 at about chassis number 4500.
Door Roller
It has been known for the door roller to seize and shatter leaving the door out of line. Advised to get the mechanism serviced and ensure that the rollers are free.
Inspection Panel
The round inspection panel by the side of the seat is used to adjust the push/pull rod. Adjusted by slackening the two nuts, one on either side of a brass dowel. The rod next to the lock side is a left hand thread.
These rods have 5mm diameter nuts, very small, and preferably worked with two long spanners. It is easier of you remove the seat.There is a BMW tool used for setting up the door micro switches.
Battery
See Battery Drain
Rattling Noise
See Rattling Noise
Cold Idle
See Cold Idle
Mirrors
See Mirrors
Windscreen
See Windscreen
Boot Leak
See Boot Leaks
Roof Leaks
See Roof
Headlight
See headlight
Rear Lights
Window Switch
See Window Switch
Winter Care
see Winter Care

